While dryer venting isn’t complicated, there are still a few critical guidelines you’ll need to follow to protect your health and safety. An incorrectly vented dryer will release lint and humidity into your home, reducing your air quality. Even worse, incorrect venting can pose a fire hazard.
Materials for a Safe, Low-Maintenance Vent
Due to the temperature of the air leaving your dryer, UL-approved high-temperature metal ducting is the only safe material choice. White plastic flex duct might seem like a practical, budget-friendly option, but it accumulates more lint than metal tubing, making it more susceptible to fires. It’s also not very durable, so you’ll need to replace it more often.
Among your best options are:
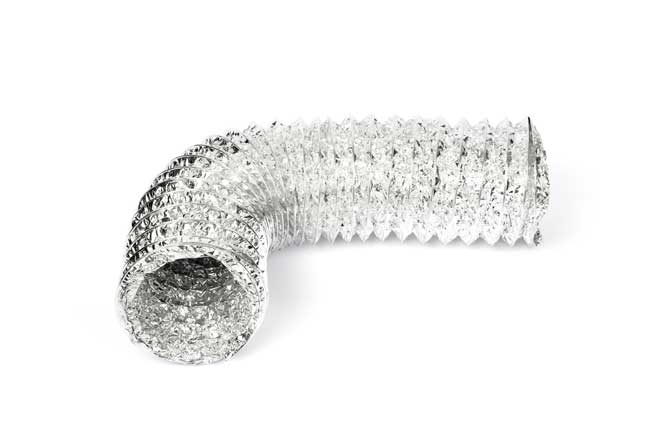
- Spiral-wound aluminum flex duct – While this is common, it’s not ideal because the uneven interior can collect lint. Before you install this type of duct, check that your dryer is approved for it.
- Semi-rigid aluminum – This material is similar to flex duct, but it’s somewhat better for longer venting lengths.
- Rigid aluminum – The smooth interior of this material makes it the ideal dryer duct choice.
- Sheet metal – This material is harder to install and therefore less common, but its thickness makes it exceptionally durable. The smooth interior is another benefit.
For most dryers, 4-inch ducting is ideal. If you’ll need to bend the duct, install elbows to prevent kinks. Never let the duct drag on the ground. Use support rings or bands to fix it to floor joists or another surface.
Connect lengths of duct with UL-approved aluminum (foil) tape or metal compression clamps Screws will only snag lint inside the duct, raising the risk of fires.
If you plan to run the duct through an unconditioned space, such as your crawl space, insulate the duct to prevent condensation from freezing in winter.
Wrapping the duct in 2 to 3 inches of fiberglass insulation is the simplest approach, but you can also buy purpose-designed dryer duct insulation sleeves.
Accessories
For added safety, consider installing a recessed dryer vent box. This is a metal or plastic box recessed into the wall to create space for your dryer vent duct, so it’s less likely to become kinked or crushed. It also protects the wall from heat and moisture damage.
With the vent out of the way, you can push your dryer closer to the wall to free up space and create an overall neater appearance.
The exterior opening of your vent requires a cover to keep out cold air, rain, debris such as leaves, and curious wildlife. Several types of covers are available.
- Vent hood – This simple, angled hood is shaped much like the vent hood above your cooking range. The underside is protected with either a damper or a grill. A damper opens to let air from the dryer out, but stays closed when the dryer is off.
- Avoid vent hoods covered with a grill or screen. These collect lint, which poses a fire hazard. They also let in small rodents and insects, debris, and outdoor air.
- Floating-shuttle cover – In this design, an arm extends from the vent opening and turns upward at a 90-degree angle. Covering this upward-facing opening is a cup-shaped lid that’s pushed up by escaping dryer air. When the dryer is off, the lid falls back down to seal the opening. This keeps all types of debris out.
- Louvered cover – This is a flat cover with one or more slats that are pushed open by escaping air from the dryer, but close again when the dryer’s not in use. This keeps out all types of debris and also saves space compared to other covers.
To improve the vent’s efficiency and protect your wall, apply caulk to seal the joint where the vent meets the exterior wall.
Planning Your Dryer Vent Path
The path your dryer vent takes from the dryer to the outdoors makes all the difference in the vent’s ability to perform safely and efficiently. Aim to use the shortest, straightest route possible. This reduces the need for elbows and other turns that tend to accumulate lint.
If you’ve bought a dryer vent kit, the instructions should provide guidance on the ideal length.
Whenever possible, keep your vent duct to less than 25 feet in length and add elbows only when unavoidable. Turns reduce the length of ducting you can safely use, so reduce your total planned length by 5 feet for every 90-degree turn and 2.5 feet for every 45-degree turn. So if your path includes one 45-degree turn, the duct turn should be no longer than 22.5 feet long.
The simplest solution is to run the vent straight through the wall behind the dryer to the outdoors. If that won’t work, vent it through the nearest exterior wall.
For a dryer in the basement, run the duct upward, then horizontally along the ceiling joist to the outdoors. Position the outdoor vent opening at least 1 foot above the ground to allow for air circulation and to keep the vent clean.
Avoid running the vent out through the roof. It’s more likely to clog there, it can attract birds and other nesting animals, and in snowy climates, it will contribute to ice dams that can damage your roof.
Venting a dryer is a relatively simple DIY job, but it’s still one that’s worth putting some care into. Investing a little time into choosing the right materials and path for your dryer vent will help your dryer run more efficiently, protect your house from moisture damage, and most importantly, reduce the risk of fires.


