
Bath Fan That Installs on Wall or Ceiling
December 15, 2023
Expert Advice On Improving Your Home
Toilets have been around since at least the days of Emperor Commodus, and the technology hasn't changed much in all of that time. Modern toilets enjoy a more efficient use of water and are a bit more appealing, yet they are just as prone to breaking, if not more so.
A leaky toilet can create numerous problems, from higher water bills to potentially damaging your home. They might even pose a potential health risk if the base is leaking.
But what can you do if you suspect your toilet is leaking? How do you test for leaks, and how are these leaks repaired?

It isn't always apparent where a toilet leak is coming from. Whether there is a visible disturbance in the bowl or barely audible gurgling sounds, the leak can usually be located after running a few simple tests.
Disturbances in the bowl water suggest a leak in the tank. Add some food coloring to the water in your tank and allow the toilet to sit for half an hour without use. Tinting of the bowl water is a clear sign that the leak is coming from your tank.
The handle assembly tends to be the most common cause of leaking in toilets. Jiggle the handle, and if the leaking sounds stop, the cause may be located within that assembly. Handle-related issues are easy to fix and usually involve a loose chain or bad flapper.
Add some food coloring to the water in your toilet bowl and let it sit for half an hour. When you return, take a paper towel and slowly wipe around the outside of the bowl. Be sure to also wipe the floor immediately around the toilet.
If you spot tinted moisture on the paper towel during your inspection, then you have located the source of the leak. This may often reveal damaged components such as the wax seal under the base, the bolt gasket, or the spud washer (under the tank).
Remove the tank lid and listen carefully. If you hear hissing or gurgling noises, try to follow the sound with your ear to locate the source. Even if you can't locate the actual leak, this test will often narrow the search area drastically.
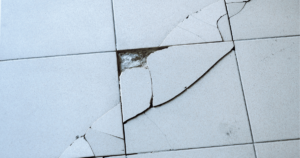
Due to the way toilets are designed, chips or cracks - even minor ones - can cause leakage. Examine the area where you suspect the leak with both your eyes and fingers to locate potential damage. In the event you find a chip or crack, you can use a paper towel to verify moisture at that location.
Locating a leak in the base can mean one of two things: either the wax ring/seal is damaged, or the base itself has become chipped or cracked. Unlike porcelain, metal toilets do not chip and are less likely to become damaged, although they may still break under the right circumstances.
Replacing a damaged wax ring is time-consuming, but not overly difficult. As it requires you to lift the toilet base, you may wish to have a second person on-hand to assist. Make sure the water supply valve is off, the water is drained from both tank and bowl (flush and then use a plunger to empty the bowl), and the tank has been sponged out before beginning.
Unscrew the bolt from the water supply to the tank. You may wish to have a towel underneath to catch any water left in the valve. If you are working alone, you may prefer to remove the tank from the bowl, although this is optional.
Next, remove the nuts holding the bowl to the floor using a wrench. If your toilet's seal is wax, this may be a bit messy, as the wax from old rings sometimes gets onto the bolts. Gently lift he toilet and set it aside on some towels to avoid making puddles.
Once the ring is exposed, remove the flange (if present) and gently scrape away the wax. Be careful to avoid wax falling into the drain where it might cause a blockage. You will then want to clean the area to remove old wax residue.
There are three basic types of ring you may choose to replace the old ring. Wax can melt or become compressed over time, especially if the bowl shifts. Rubber rings are less messy, but can dry and crack with age. The third option is a foam ring, which springs back into shape, can help hold loose bolts in place, and has a longer lifespan than its competitors.
No matter the choice, place the new ring onto the flange. Carefully look for and remove any wax residue on the underside of the toilet and gently seat it on top of the ring, lining up the bolts with their holes. Add a washer over the bolts and screw on the nuts. Placing weight on the toilet or having someone sit on it will help push the toilet down. Tighten the bolts slowly, alternating from one side to the other to ensure the unit remains level. Be careful not to over-tighten the bolts to avoid cracking your base.
Reattach the tank (if removed) and the water supply, allowing the tank to refill. Finish by flushing a few times so that you can check for any further leakage.
Unfortunately, when the base itself becomes damaged enough to leak, there is no other solution than to completely replace the toilet. The cost for installation will vary depending on whether you replace the toilet yourself or hire a professional, as well as the type and size of the new toilet.
Repairing tank leaks tends to be both simple and cheap. Before you begin, make sure the water supply valve is shut off and flush the toilet to drain the tank. Soak up any remaining water with a sponge or cloth to avoid spills while working.
The handle, fill valve, and flapper are usually replaced at the same time. The handle itself is simply held on by a bolt, and will usually only need to be replaced if the arm to which the chain attaches to is broken.
The flapper, which is the rubber plug at the bottom of the tank, is easily removed and can fall victim to mineral buildup or erosion.
Finally, the fill valve is the bulk of the tank equipment and is usually replaced as a complete unit.
To remove the fill valve, unchain the handle and remove the fill tube and ball cock, if present. This large float is simply screwed into the valve and turns the valve on or off based on your tank's water level. Sop up any remaining water in the tank using a sponge or towel before continuing.
Place a towel under the spot where the water enters the tank to catch any spills, then unscrew the large plastic nut and shift the feed line to one side. Next, remove the flatter second nut which holds the fill valve in place. You can then remove the old valve.
Your new fill valve kit will have a rubber gasket. Remove the centerpiece and place this over the bottom of the valve. Most modern fill valves may be adjusted for tank height and have a cylindrical float surrounding the valve's shaft instead of using a ball cock. Slide the valve into place and adjust the height so that the top is slightly below the upper edge of the tank.
Screw the nut back on underneath and tighten it, making sure the small connection for the fill tube is facing the correct direction. Be sure not to over-tighten the nut to avoid cracking the tank. Finish by reconnecting the feed line to the bottom of the valve.
Inside the tank, attach the fill tube and the connector piece. You may need to trim the tube to fit. Attach it to the connector and install the flapper, being sure to adjust the chain length when you reconnect it to the handle. In the event you are using a valve that requires a ball cock, screw this back into place. Complete the project by turning the water supply back on, checking for any leaks.
The spud washer is a large piece which fits between the tank and bowl to prevent leakage, so you will need to remove the tank to access it. Using an adjustable wrench to hold the nuts under the tank, unscrew both of the bolts located at the bottom of the tank. Carefully lift the tank and lay it down. You may need to gently coax the old spud gasket off with an adjustable wrench. Once removed, fit the new spud gasket over the spud nut.
The bolt gaskets should also be replaced during this procedure. Use a wire brush to gently scrub the area clean both inside and outside of the tank for a more secure fit. Slip a new gasket onto each bolt and place into the holes.
Next, sit the tank back into place, making sure the bolts slide through the holes in the base. Finally, put the nuts back on the bolts and gently hand-tighten them. Alternate between the two sides until you have a snug fit. Be careful not to over-tighten the bolts, as this may crack the base.
Bath Fan That Installs on Wall or Ceiling
December 15, 2023
Does This Product Really Repair Chipped Porcelain? (Review)
December 28, 2023

Glacier Bay Power Flush One Piece Toilet
December 27, 2023

Guide to All the Parts of a Toilet Tank
April 7, 2024

Spa Bathroom Ideas: 5 Ways to Create a Relaxing Retreat
December 28, 2023

April 8, 2024

March 31, 2024

April 10, 2024


